
Installing OpenClaw is fairly straightforward whether you’re using Linux or running it on Windows through a compatibility layer. OpenClaw acts as a powerful automation gateway that can connect AI models, chat platforms, and automated workflows in one place. Once installed, it can run continuously in the background and respond to commands from messaging apps or APIs.
This guide walks you through the most common installation methods and how to verify that everything is working correctly.
1. Install OpenClaw on Ubuntu and Debian
Linux users, especially those running Ubuntu or Debian, can install OpenClaw using several methods depending on their setup.
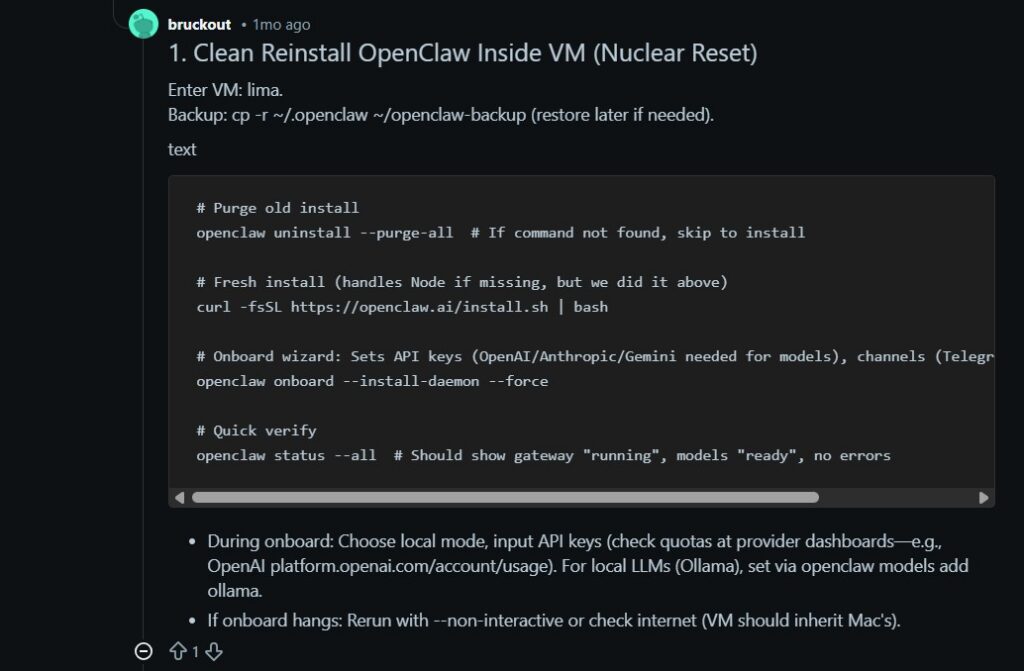
The easiest option is the standard installer script, which automatically downloads and configures OpenClaw. After installation, run:
openclaw onboard –install-daemon
This onboarding step configures your models, channels, and installs a background service so OpenClaw starts automatically when the system boots.
For hardened production servers, you can use the Ansible installer. It deploys a secure setup with a UFW firewall, Tailscale access, and Docker agent sandboxes. Run the automated installer:
curl -fsSL https://raw.githubusercontent.com/openclaw/openclaw-ansible/main/install.sh | bash
Developers who prefer manual control can install OpenClaw using Node.js and npm. After installing Node.js 22+, run:
npm install -g openclaw@latest
openclaw onboard –install-daemon
Alternatively, OpenClaw can run in a fully containerized environment using Docker Compose.
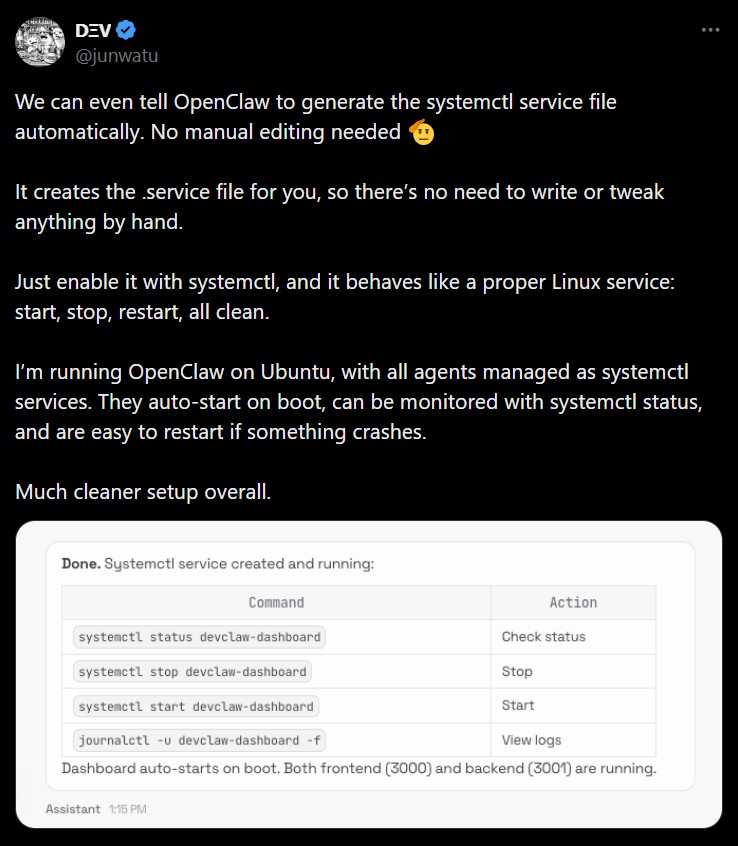
When installed natively, the onboarding process usually creates a systemd user service and enables loginctl enable-linger $USER, ensuring the OpenClaw gateway continues running even after logout and automatically restarts when the system boots.

2. Run OpenClaw on Windows Using WSL2

Although OpenClaw is mainly built for Linux, Windows users can run it easily using Windows Subsystem for Linux.
Step 1: Install WSL2 and Ubuntu
Open Microsoft PowerShell as Administrator and run:
wsl –install
To install a specific distro version:
wsl –install -d Ubuntu-24.04
Restart your computer if Windows asks you to.
Step 2: Enable systemd in WSL
OpenClaw relies on systemd for background services. In your Ubuntu terminal, run:
sudo tee /etc/wsl.conf >/dev/null <<‘EOF’
[boot]
systemd=true
EOF
Then restart WSL from PowerShell:
wsl –shutdown
Reopen Ubuntu and confirm systemd is running with:
systemctl –user status
Step 3: Install OpenClaw
Inside the WSL terminal, run the installer:
curl -fsSL https://openclaw.ai/install.sh | bash
openclaw onboard –install-daemon
Developers can also install from source using Git and build tools.
Step 4: Configure Auto-Start
To keep OpenClaw running in the background, create a Windows scheduled task that silently launches WSL at startup.
LAN Access Note:
Because WSL runs on a virtual network, the dashboard is typically available at http://127.0.0.1:18789. For access from other devices, use Tailscale or configure a Windows netsh portproxy.
3. Verify OpenClaw Installation with openclaw status
After installing OpenClaw, it’s important to verify that the gateway, models, and connected services are working properly.
Basic Health Check
Start with a quick system overview by running:
openclaw status
This command displays key information such as active channels, authentication status, gateway runtime health, node host installation status, and update channel details. If everything is healthy, it means the gateway daemon is running and integrations are functioning correctly.
Deep Verification
For a more thorough check, run:
openclaw status –deep
This performs live probes on connected services like WhatsApp, Telegram, Discord, and Slack to confirm they are properly connected and operational.
Full Diagnostic Report
If troubleshooting is needed, generate a detailed report with:
openclaw status –all
This produces a comprehensive system summary while automatically redacting sensitive tokens.
API Usage Tracking
To monitor AI provider quotas and usage, run:
openclaw status –usage
In-Chat Status Check
Once the bot is running, you can simply send /status inside your chat app to receive a status card showing connection health, model usage, and recent activity.
If issues appear, run:
openclaw gateway status
openclaw models status
openclaw doctor
These commands diagnose configuration issues and often provide automated repair steps.
With the correct installation method and verification checks, OpenClaw can run as a reliable automation gateway that connects AI models, messaging apps, and workflows into a single powerful system.
- OpenClaw AI Model Integration
One of the most powerful features of OpenClaw is its ability to connect with different AI model providers. Instead of..
- OpenClaw Memory and Skills System
Modern AI assistants become far more useful when they can remember information and perform repeatable tasks. That’s exactly what the..