
These days, making images with AI is very easy. You don’t need to be good at design or use expensive software. With the right tool, you can turn your ideas into pictures in just a few minutes. One useful tool is Google Flow from Google Labs.
Many people don’t like watermarks on AI images because they make pictures look messy and less professional. The good news is, Google Flow lets you create images without any watermark. This makes it great for school work, social media, blogs, or personal projects.
In this guide, you will learn how to use Google Flow to make clean AI images step by step.
Step-by-Step Guide to Create Images Without Watermark
Follow these simple steps to start creating your own AI images.
Step 1: Open the Website

First, open your browser and go to:
https://labs.google/fx/tools/flow
Make sure you are using a modern browser like Chrome or Edge for better performance.
Step 2: Sign In With Your Google Account
When the website opens, you will see a sign-in option.
Log in using your Google account. If you don’t have one, you can create it for free.
This step is needed so you can save your projects and use all features.
Step 3: Click “+ New Project”
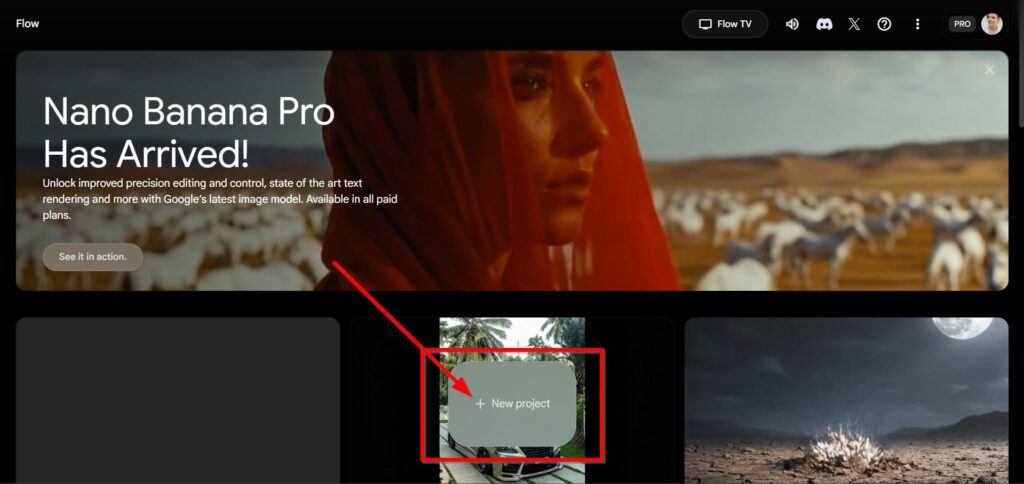
After logging in, you will see the main page.
Look for the “+ New Project” button and click on it. This will open a new workspace for your image.
Think of this as your personal creative space.
Step 4: Type the Image You Want
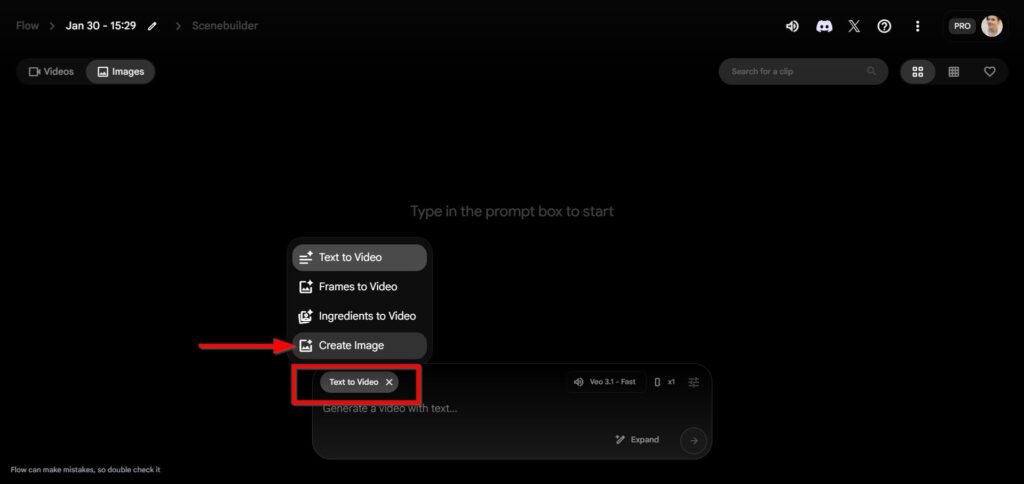
Now, type what kind of image you want in the text box.
This is called a prompt. It tells the AI what to create.
For example, you can type:

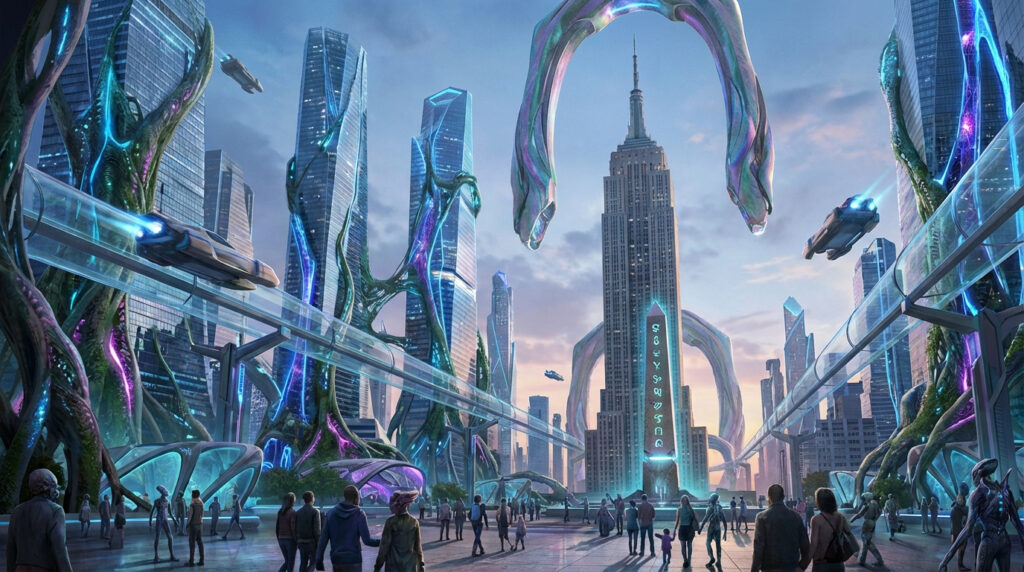
“Make an Image of a Futuristic New York with Alien-based Technology”
Try to be clear and add details. The better your description, the better the image.
After typing, click the generate button and wait a few seconds.
Step 5: View and Download the Image
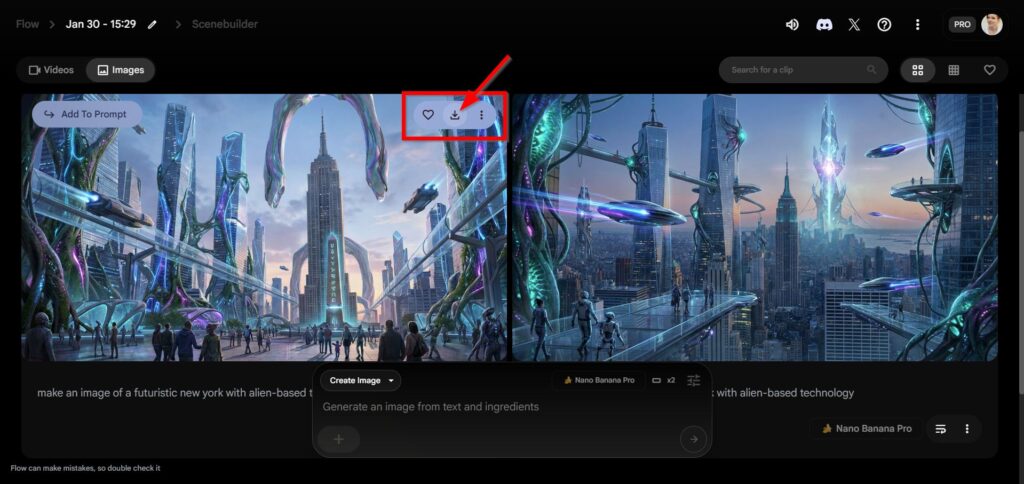
When the image is ready, it will appear on your screen.
Look at it carefully. If you like it, click the download button to save it.
You will notice there is no watermark on the edges. This makes the image look clean and nice.
Step 6: Edit or Improve the Image (Optional)
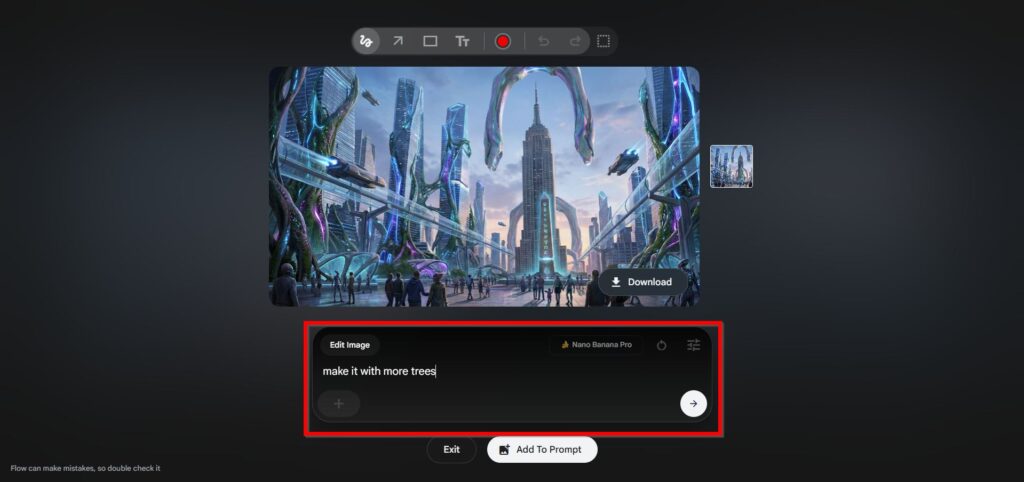
If the image is not exactly what you want, you can improve it.
You can change your text, add more details, or try again.
For example:
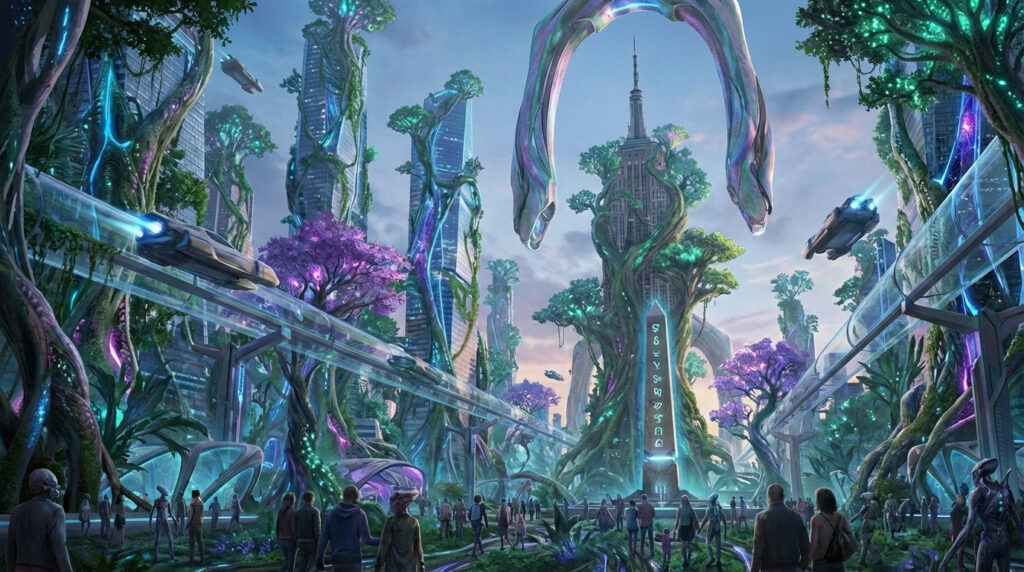
“Make It with More Trees”
Then generate again until you are happy with the result.
Step 7: Enjoy Your Watermark-Free Image
After downloading, check your image again.
You will see there is no logo or watermark. You can now use it for posts, slides, or personal projects without any problem.
It’s simple, fun, and worth trying.
Making AI images without watermark is easy with Google Flow. You only need a Google account and a good idea. With a few clicks, you can turn words into clean, beautiful images. Try it today and enjoy creating your own AI pictures for free.
- How to Use Google Antigravity as an Agent-First AI IDE for Coding
Google has recently released Antigravity. This is an agent-first development platform for modern developers. It uses the familiar VS Code..
- Nvidia Build Their Own Version of Openclaw
Nvidia is quietly preparing to launch a major new platform for AI agents, and it could change how businesses use..
- Facebook Acquire Moltbook, AI-Only Social Platform
Meta, the company behind Facebook and Instagram, has made a move that sounds like something straight out of a science..
- How to Install OpenClaw on a Local VPS Without Subscription Fees
If you want your own private AI assistant running on your own server, not on someone else’s platform, OpenClaw might..
- How to Make AI Song for Free
Have you ever wanted to create your own music but felt that it was too hard, too expensive, or required..
- How to Stop Spam Emails on Gmail
Do you often open your Gmail and feel frustrated by unwanted emails, ads, fake offers, or strange messages? These spam..